1. Click on the “Get Started” option to start the application as shown in Fig no:1.
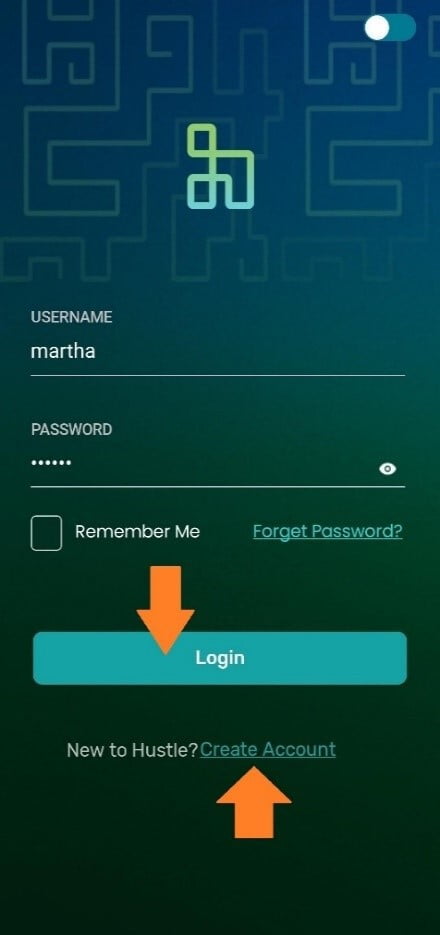
2. Enter valid login credentials and click on “Login”, if the user is new to the Hustle application then click on “Create Account” to create a Hustle account as shown in Fig no:2.
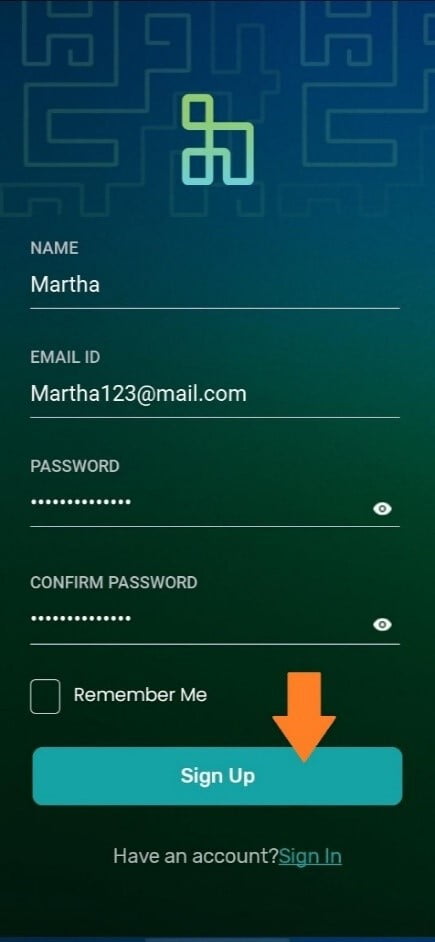
3. Enter name, email, password, and confirm the password and click on “Sign Up” as shown in Fig no:3.
Fig no:1 Get Started
Fig no:2 Login
Fig no:3 Sign Up
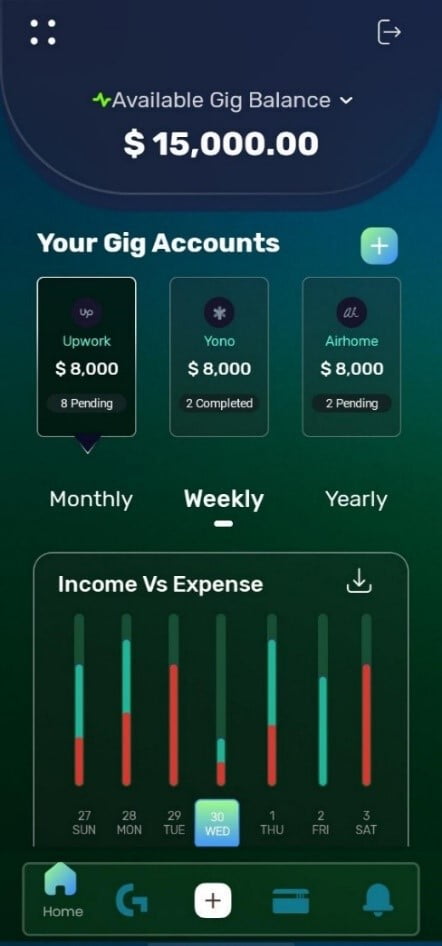
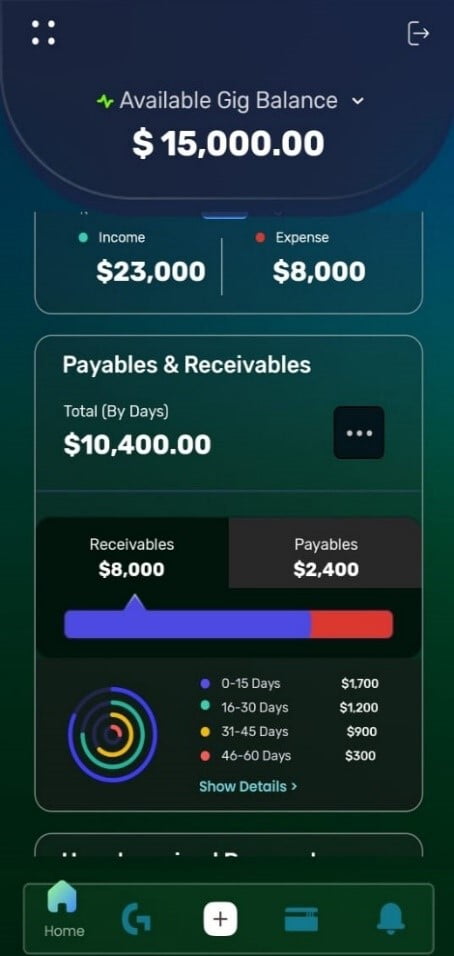
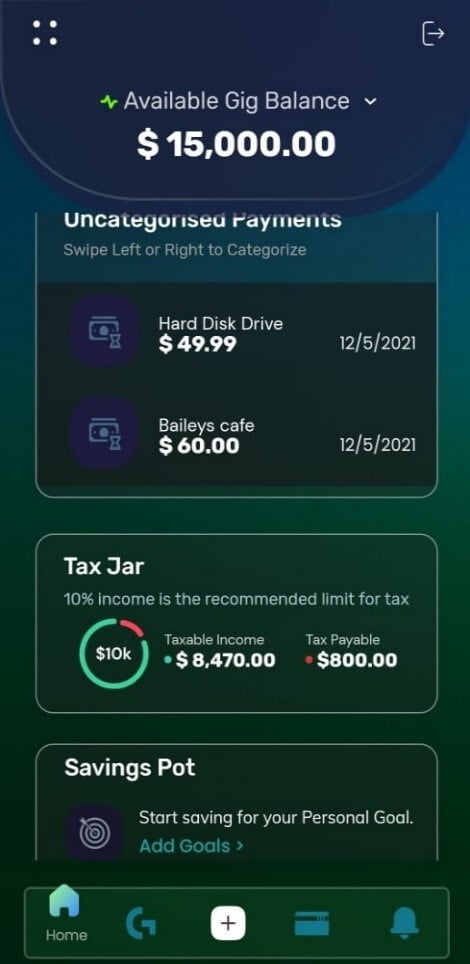
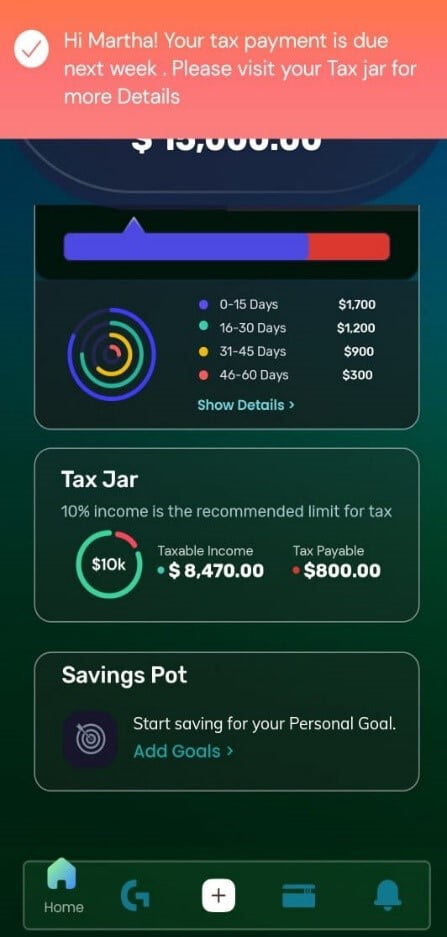
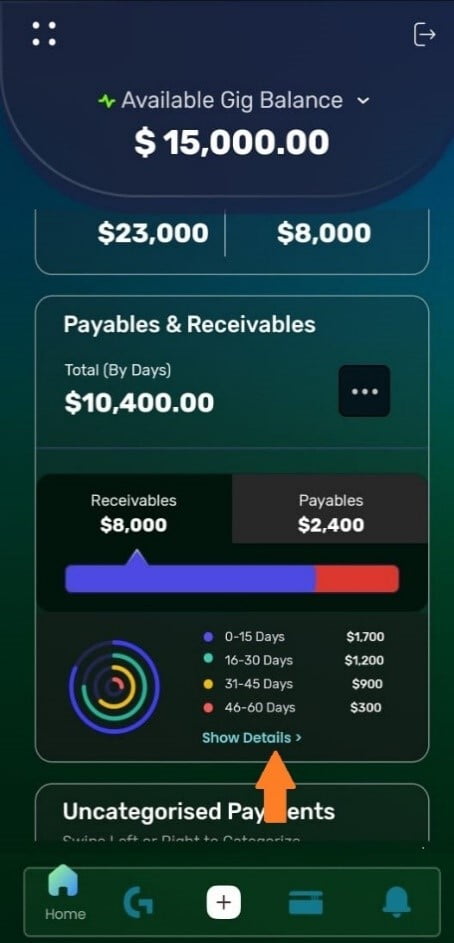
4. View the gig dashboard containing gig account balances, daily income and expenditure, payables and receivables projection, provision for taxes, and savings pot as shown in Fig no:4.1, Fig no:4.2, and Fig no:4.3.
Fig no:4.1 Gig Dashboard
Fig no:4.2 Gig Dashboard
Fig no:4.3 Gig Dashboard
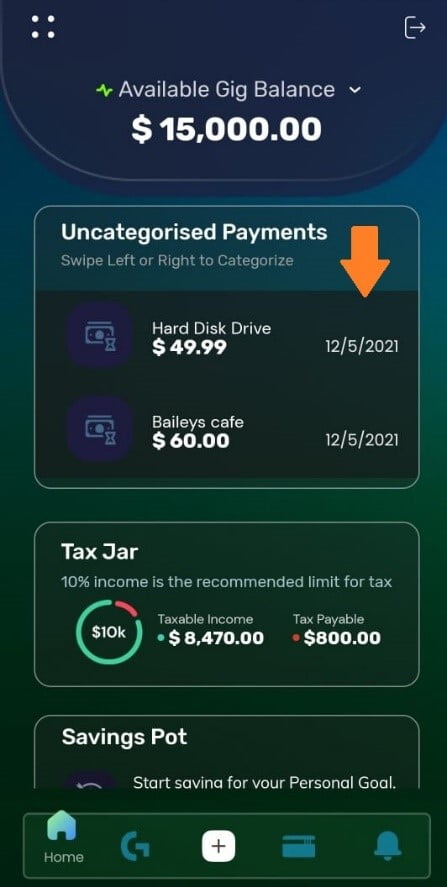
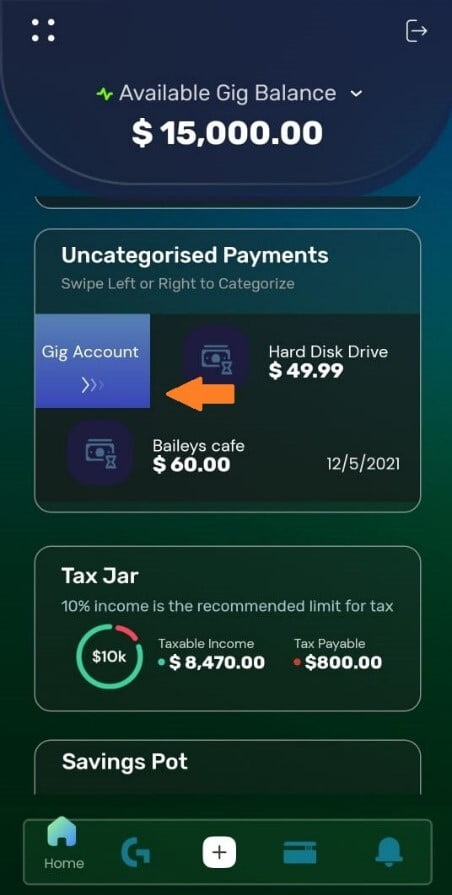
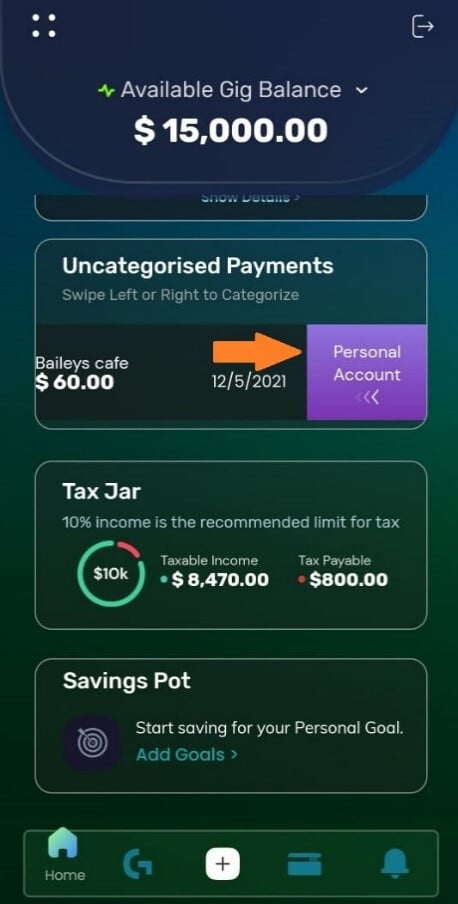
5. Scroll down to uncategorized payment and tap on each expense to tag them as Personal accounts or Gig accounts as shown in Fig no:5.1, Fig no:5.2, and Fig no:5.3.
Fig no:5.1 Dashboard
Fig no:5.2 Categorizing to Gig Account
Fig no:5.3 Categorizing to Personal Account
6. View tax payment notification on top as shown in Fig no:6.
7. Tap on “Show Details” to see the complete list of receivables as shown in Fig no:7.
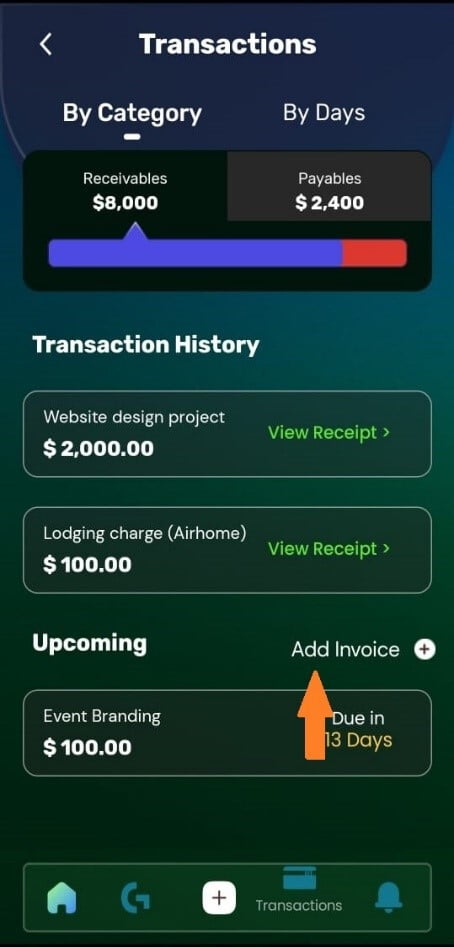
8. To create a new invoice, click on “Add Invoice” as shown in Fig no:8.
Fig no:6 Dashboard
Fig no:7 Dashboard
Fig no:8 Transactions (Receivables)
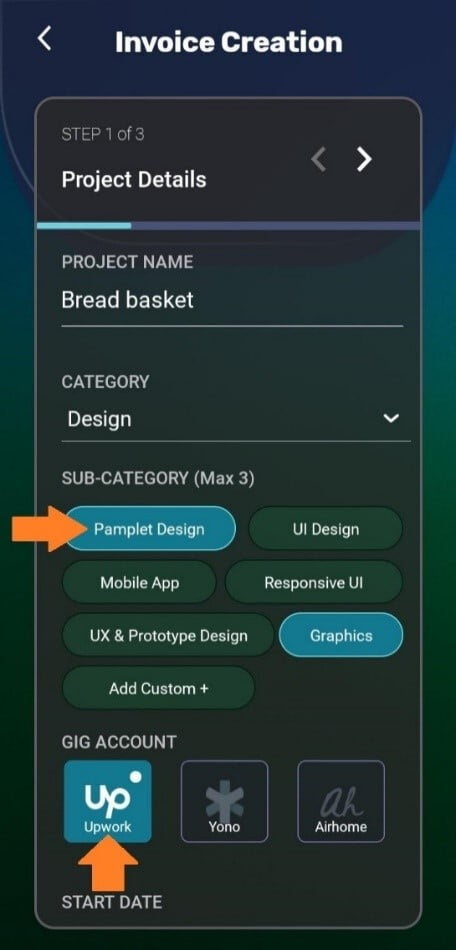
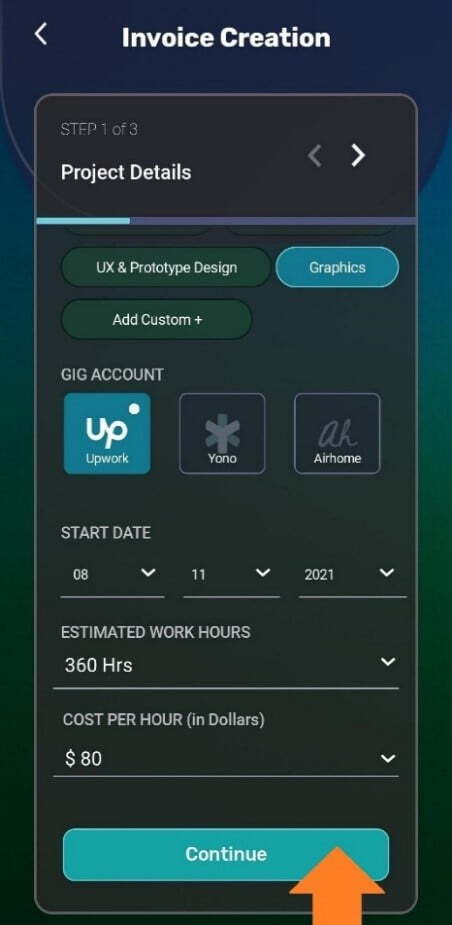
9. Enter the project name, choose category and gig accounts, as shown in Fig no:9.
10. Select the start date, estimated work hour, cost per hour, and click on “Continue” as shown in Fig no:10.
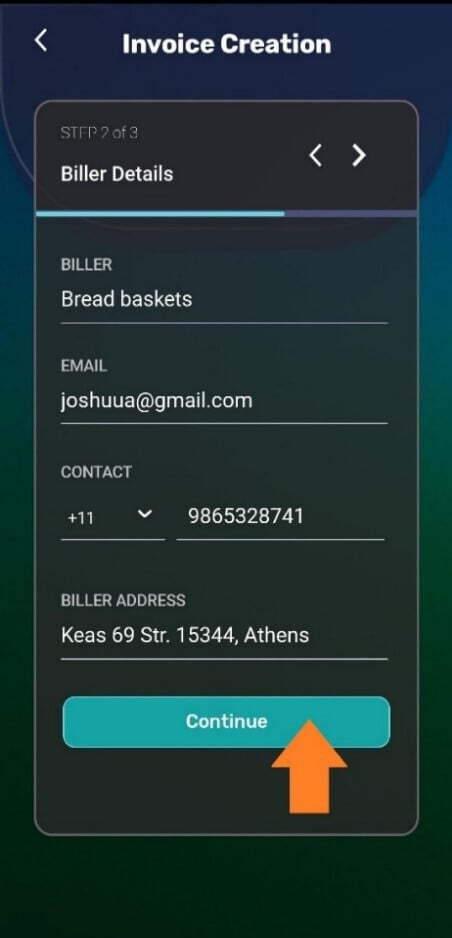
11. Enter biller details like name, email, contact number, address and click on “Continue” as shown in Fig no:11.
Fig no:9 Invoice (Project Details)
Fig no:10 Invoice (Project Details)
Fig no:11 Invoice (Biller Details)
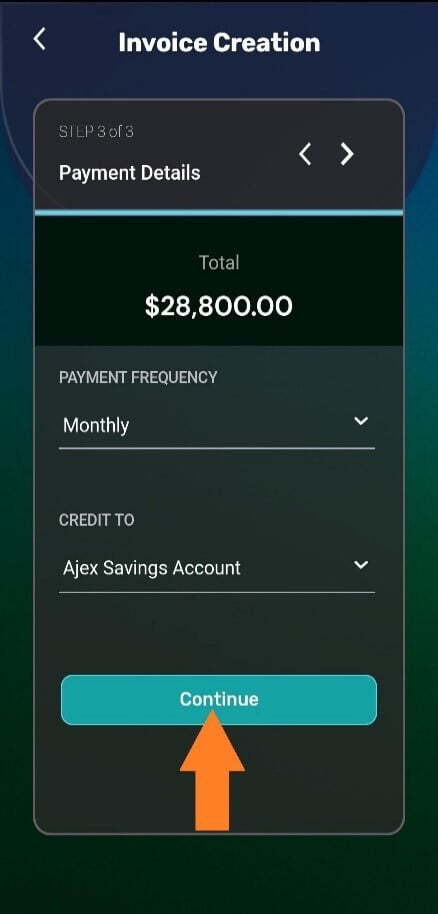
12. Check the Payment details like the total amount and select the payment frequency and credit account and click on “Continue” as shown in Fig no:12.
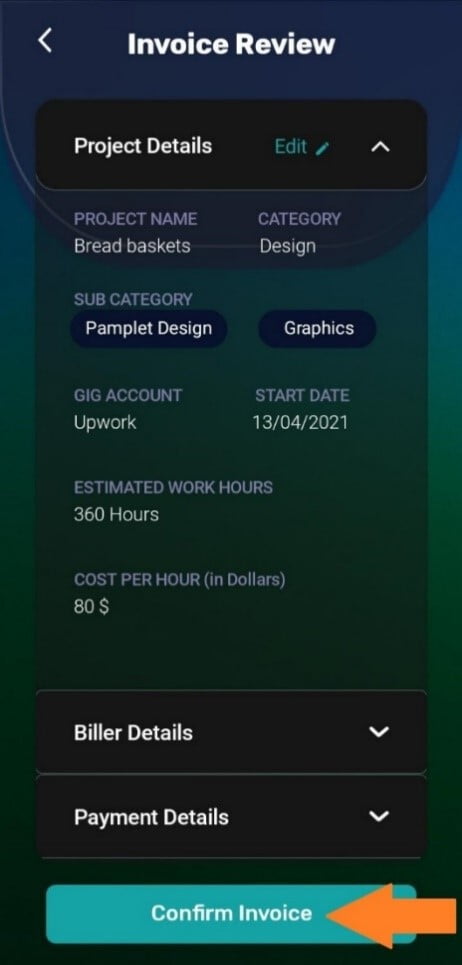
13. Check Project details, Biller details, Payment details and click on “Confirm Invoice” as shown in Fig no:13.
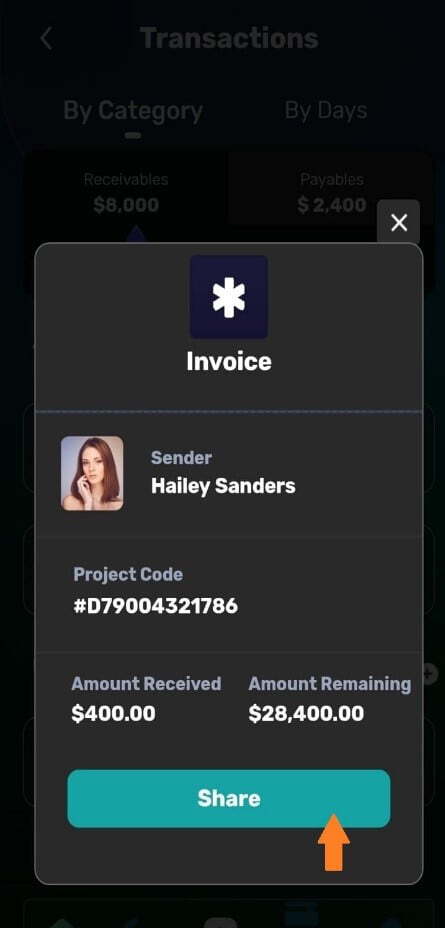
14. Click on “Share” to send an email of the invoice to the biller as shown in Fig no:14.
Fig no: 12 Invoice Creation (Payment Details)
Fig no:13 Invoice Review
Fig no: 14 Invoice Receipt
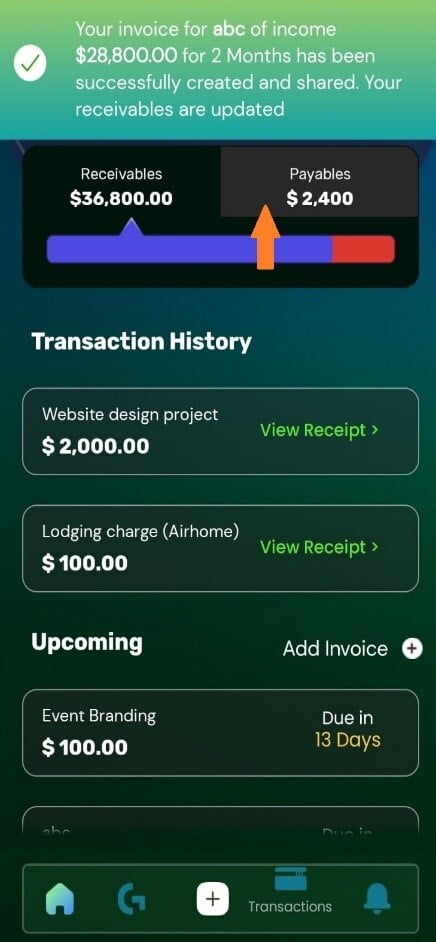
15. View successfully shared notification and click on payables tab as shown in Fig no:15.
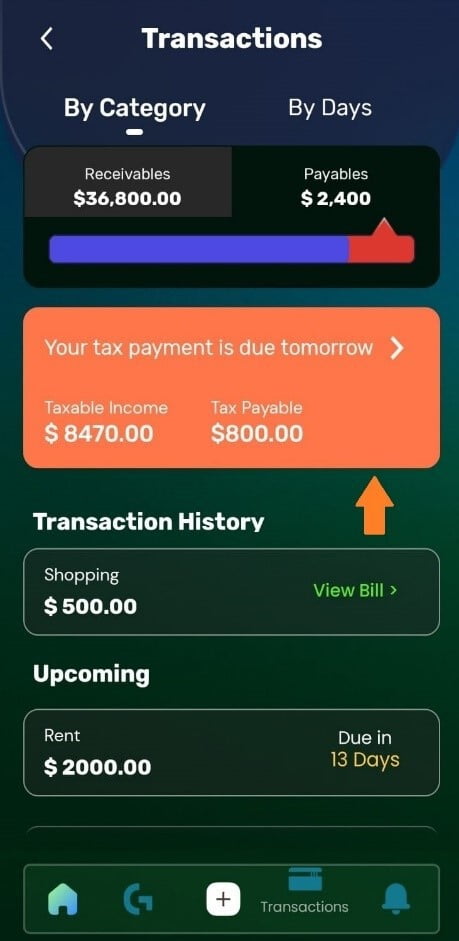
16. Click on tax payment reminder as shown in Fig no:16.
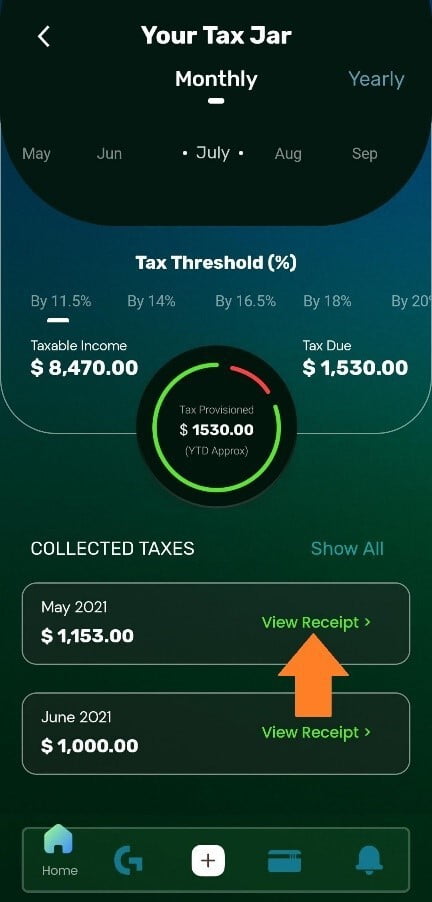
17. Check the tax jar to see the tax provisions set aside for every income head, click on “View Receipt” as shown in Fig no:17.
Fig no:15 Transaction
Fig no:16 Transactions (Payables)
Fig no:17 Tax Jar
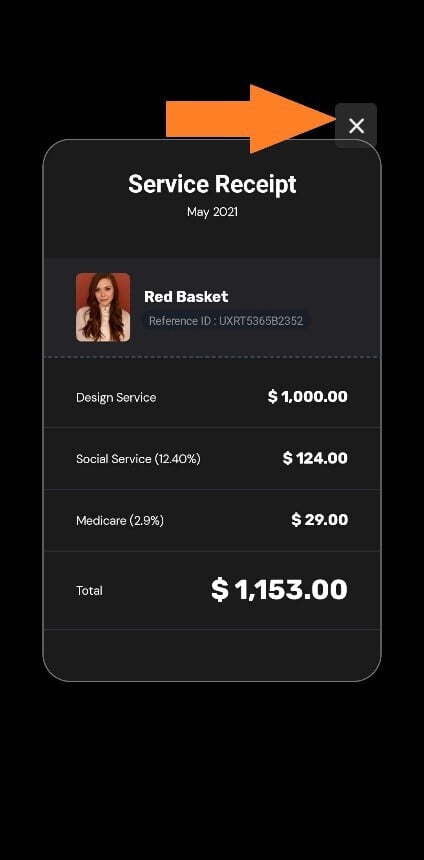
18. Click on the “Cancel” option to close the receipt as shown in Fig no: 18.
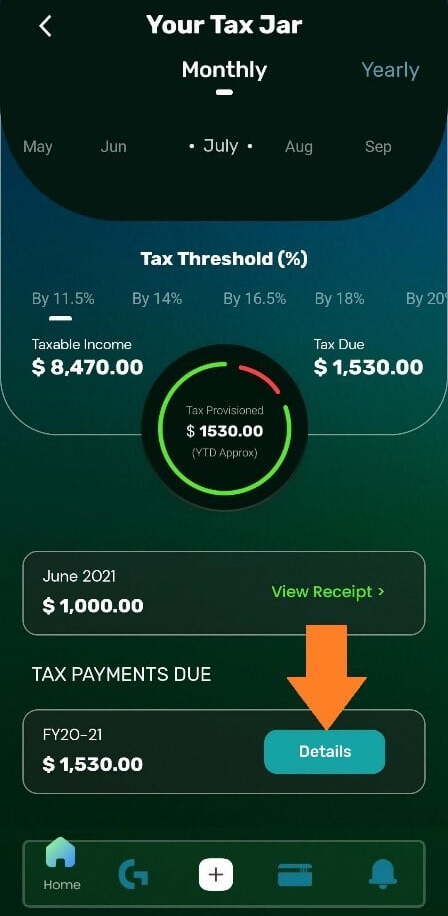
19. Check tax payment due for the year 2020-2021 by clicking on the “Details” as shown in Fig no:19.
20. Click on “Generate Statement” to send your income and expense report to your email id as shown in Fig no:20.
Fig no:18 Service Receipt
Fig no:19 Tax Jar
Fig no:20 Tax Bill
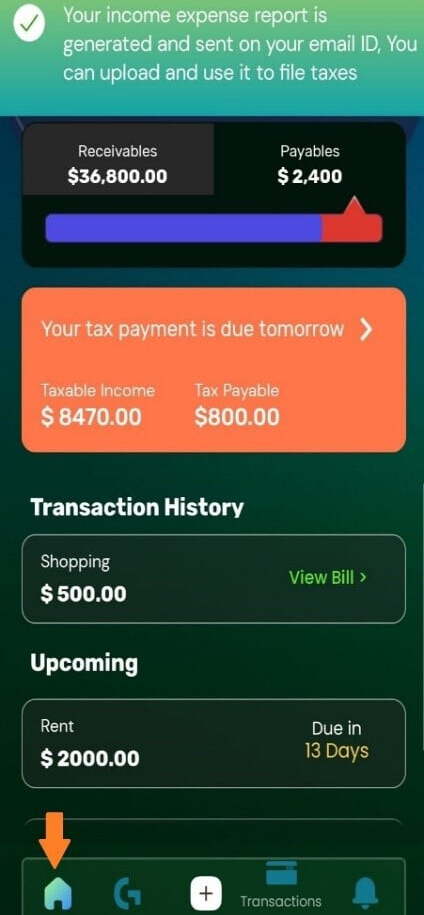
21. Check the notification and click on Home to go back to dashboard as shown in Fig no:21
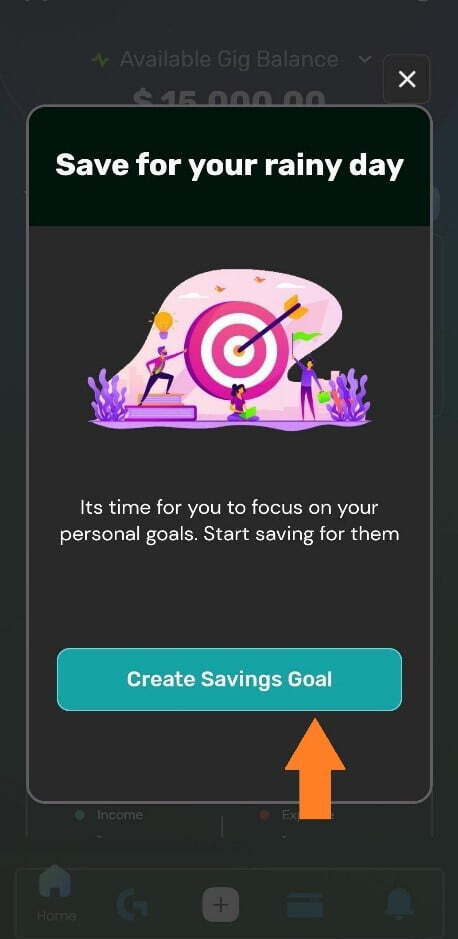
22. Click on “Create Savings Goal” as shown in Fig no:22.
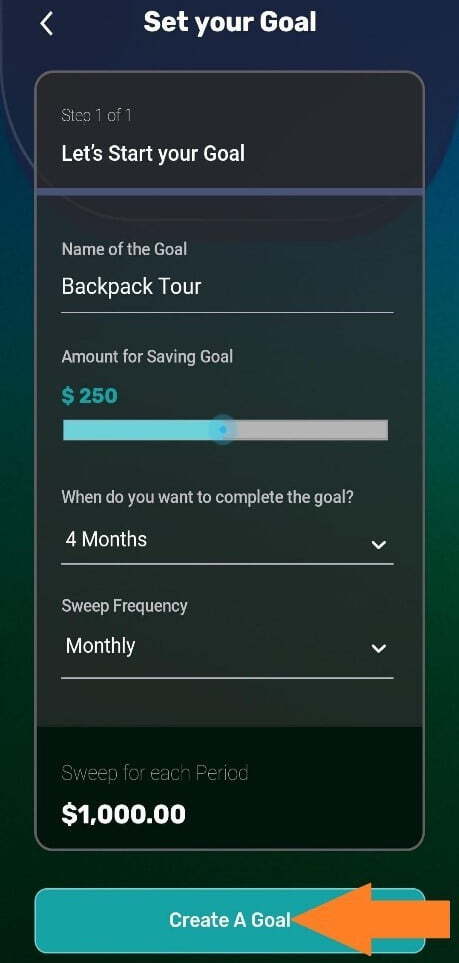
23. Enter the details like name, the amount for saving goal, months to complete the goal, sweep frequency and click on “Create A Goal” as shown in Fig no:23.
Fig no:21 Transaction (Payables)
Fig no:22 Dashboard
Fig no:23 Set your Goal
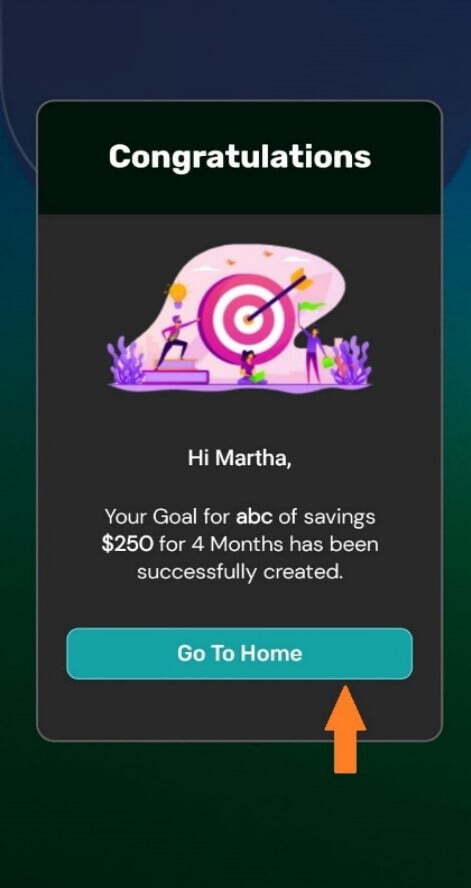
24. View successfully created goal and click on “Go to Home” as shown in Fig no:24.
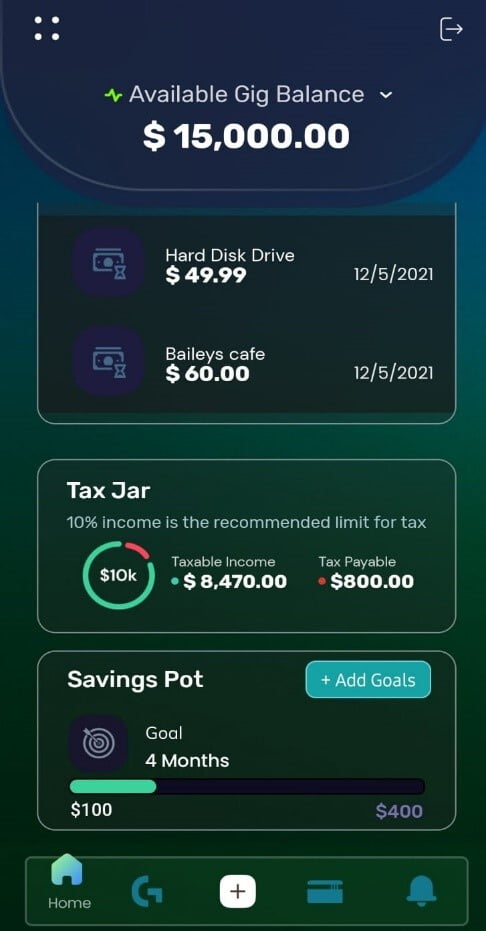
25. Scroll down to view the new goal added as shown in Fig no: 25.
Fig no: 24 Congratulatory Message
Fig no:25 Dashboard